Building Your Own Cage?

Chinchilla & Hedgehog Pet Forum

Help Support Chinchilla & Hedgehog Pet Forum:

This site may earn a commission from merchant affiliate links, including eBay, Amazon, and others.

dayofhope

Well-known member
Joined
Feb 12, 2010
Messages
130
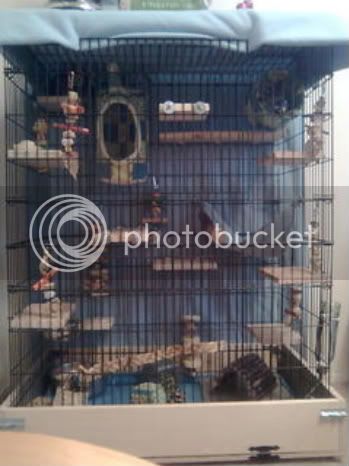
I've decided my cage isn't big enough for my chin. It's not small, but I'd like her to have more room. :)

Anyway, I was thinking about buying her a new one, but now I'm wondering how hard it is to make one? I mean, do you have to have a lot of experience in building? It'd be just a simple rectangle shape, nothing fancy.

So,
About how much would it be to make one?
Is there any step-by-step instructions?
And just anything about it would be really helpful. I'm not 100% sure if I'll be making one or not yet, which is why I figured I'd ask here first.

Thanks in advance. :)
 
I didn't think it was all that difficult to make one... and I thought mine turned out ok. It took a reasonable amount of planning before getting anything, because you can't re-cut wood (at least not the same piece) if you get it cut too small! We had to re-do a few sections because I didn't take into account the fact that 6" wood is really 5.5" wood, which threw off the measurements.

I feel like mine cost $200ish to make? It might have been more, might have been less, but I didn't have a staple gun, any screws, etc. If I was to build another cage, it'd cost me much less cause now I have the staple gun, screws, etc just sitting around.

I feel like there is some website out there that for $5 will give you cage plans. I can't think of where off the top of my head though.

This is mine:

melamine_3.jpg


Don't mind the plastic in the cage next to, that was a rescue I had just gotten in that day and hadn't had time to re-do the cage yet at the point the pics were taken.
melamine_2.jpg


melamine_4.jpg
 
Greychins' is nicer than mine. Mine is a wooden frame with hardware cloth stapled in it. This means I have to mount the Chin Spin on hardware cloth, which has broken twice from the weight and heavy use of the Chin Spin, and I've had to replace it. It may even be due for another replacement now. Keep in mind I have only had my chin a year and a half.
My chin has also peed along the lower inside of the wooden frame. That is very hard to clean, practically impossible. All I can really do is spray with vinegar and blot. All in all, I will probably replace with a FN 141 or 142 in a few years. Just my two cents.
 
I feel like there is some website out there that for $5 will give you cage plans. I can't think of where off the top of my head though.

I think it was Spoiled Chinchillas, but they weren't breeding anymore and the website isn't up anymore :( But I'd bet otherd do that too.
 
Greychins, your cage turned out really well. If I were to build one, I'd want it kind of like that. But I'd want each side to be wire for the air flow, I'm just not sure how that would work with ledges? Hmm... maybe I could even use some of the wires of my old cage... I dunno lol. You used melamine on the inside, right? I plan on tiling my cage, not sure if I'll be grouting it down or not though. What did you need a staple gun for? Did you have to do a lot of drilling and such?

Maia, that's a good point. I don't have a wheel at this point... one day I might get one, but probably not for a while. Cleaning might be an issue... maybe lol. I'm gonna keep an eye on CL and if I see a good deal on a cage, I'll get it, if not, I'm gonna talk to my parents about making a cage in a few months. :)

I'm always a little leery about looking at other websites, especially ones that advise giving chins things like raisins. It's just like "okay... since I can't trust you on that, I wonder if everything else you say is safe..." you know? :/
 
Well thank you. :)

I've seen cages that are wire that do have ledges attached - the ledges are often screwed/nailed into the frame of the cage, so I suppose they'd be less moveable than in a commercial cage. I would think if you were going to make a cage where you wanted to attach the ledges directly to the wire, I would go for the thickest hardware cloth you can find. Less bendable = stronger.

My entire cage is melamine - it's not the press-on paneling, it's the melamine coated board... so it's HEAVY (it's on casters, though - I'm surprised I thought of that before I had the cage all together). The advantage, though, is that nothing really soaks into it (the melamine). There are sometimes pee spots on the wall from chins spraying, but it wipes clean with a wet cloth. As for the bottom though, I had bass equipment make me a custom pan for my cage, because the melamine couldn't take the constant wetness from the pee (even though I like to think I clean often). I would recommend getting a metal pan if your chins aren't litter trained.. My melamine actually started bubbling and getting wrinkly (if that's possible) from the wetness.

The drilling wasn't bad. This was actually the first thing I've really "made" (next are rolling run stands - those... I'm worried about... those have to support weight) and I thought it wasn't too bad. The drilling was just to connect all of the cage together - it's held together with drywall screws. I do feel like a drill was necessary though - this would have taken forever to do by hand.

As much as I love my all-wire cages... the one thing I do love about this one is that the shavings only come out the front of the cage. Course, it's one cage among all our others, so it doesn't make a huge difference.

I used the staple gun to staple the hardware cloth to the doors and the roof (the top of the cage is mostly wire, helps with airflow). I'm not sure how others attach the hardware cloth, but that's how I did....

Oh sure. Well, you can always look at other people's cages and design one of your own...
 
can't say i've completely built a full cage, but what i did was use the wire cage part from a cat cage (Precision brand Kitty Condo), and built my own pine base for it (just shy of 3 foot x 2 foot). still haven't gotten around to making the lift-out tile bottom for it yet, but that will happen at some point.

i made my front panel a drop down on hinges, so that i could get the bottom cage door open easily (the door hinges downwards and about a quarter inch below the top edge of the wood, ugh! lol). then again, the almost 6 inch tall pine sides do keep hay and poops in pretty darn good!

here is the cage with the base's front panel closed. you can see the silver latches on each side, and the black hinges on the bottom. i also have casters on there to make moving the cage for vacuuming really easy. i'm thinking i might put actual legs on the base, so that the front panel drops down all the way, and makes for easier sweep out of the cage bottom. will also raise the cage up a bit, and maybe i'll do a storage space underneath with a shelf or two?

Image0473.jpg
 
Ugh I typed out a reply, clicked reply, and I'm logged out. Clicked back to see if I can copy/paste it, and it's erased. :/ darn. lol Prolly should have just logged in. Oh well, time to retype it...

My chin isn't potty trained yet. Hopefully, when I tile the cage she learns. You saying that made me decide to wait until she's potty trained to grout the tile, in case I need to replace some tile. I'll have to see if we have a drill or saw... and if someone in my family would be willing to do it or teach me. I wasn't sure whether or not staples were allowed in the cage, but it's probably in a place they can't get to anyway. It'll be the first thing I've ever built, too, so I'm kind of nervous. But I think it'll turn out well. Best of luck with the rolling run stands.

Chinnymom, I like your cage too. I googled the kitty condo, and it definitely sounds like it made building easier! Lol. But it turned out really well, almost like a safe one you'd find at a store.

I'm thinking my cage will be like this: http://www.chinchillacymru.co.uk/buildcage.htm but with a door like greychin's. Should the dimensions be like 3ft x 2ft x 4-5ft?
 
when i go to make the lift-out tile bottom, i'm not grouting between any tiles, i'm just going to butt them up tight against each other and use tile glue underneath (but not coming right to the tile edges). considering the tiles i bought were about a buck and a quarter each, and the wood will be free from my dad's garage, i'm not too worried about having to replace the whole lift-out tile bottom, lol.

then again, Rhino is pee potty trained pretty darn good, and i will still have a fleece liner in there, maybe over only half the tile bottom?
 
when i go to make the lift-out tile bottom, i'm not grouting between any tiles, i'm just going to butt them up tight against each other and use tile glue underneath (but not coming right to the tile edges).

That's an idea. I'd just be a little worried about pee getting between the cracks in case I ever decide to put another chin in who isn't potty trained.

I found out we do have a drill, so that'll make life easier. :)
 
Here is a link to the cages that have me drooling the most. Ticklechin went all out for her chins!

http://chins-n-hedgies.com/forums/showthread.php?t=14872

I ended up with a wired together collection of grid squares. It took a bit of wrestling to get it together, but once it was stable it was as solid as any store-bought wire cage. Mesh squares make up the sides and back. Open grid squares make up the front, top and second level floor. A little hardcloth and a wheel, a presentation cardboard as the first floor pan with fleece over that, and Chipper has a 28" cube to play in that mimics the little wire cage he was given to me in. The roof is about 6" higher than that to fit the 15" wheel in the second half and still have floor under it. But you get the idea.

A little backstory on how this cage came about: Chipper was given to me with the idea that he would go to a niece and nephew in about a year or two (not the giver's idea, mine). My husband didn't want to spend any money on a pet we weren't keeping so when I started complaining about the rattling wire cage Chipper was in he said no. So I started thinking outside the box. I didn't have time in my busy schedule at the time to build a cage. The last one I'd built was a light one for budgies that Chipper would have torn through in one hour. So I had to think of something more durable made from inexpensive materials that I could put together in one night. I'd seen grid cages for rabbits so I started looking around for those storage cubes. One of my local stores had a sale and eBay had a listing for the mesh version. The total cost for one two-level cube cage was about $75. Husband said yes and Chipper's cage was born. I prepared the platform, two 18gal tubs leveled with shelving, and bought the grids. Chipper is safe and clean and has plenty of room for all his stuff. When it became apparent we were keeping him I priced out a FN. Husband looked at the space we had Chipper's cage in and said no, so I focused on making the grid cage better. We got a wheel and new potty dishes instead. He now has facilities on both levels and a Chin Spin. The grids hold that heavy wheel just fine and it doesn't rattle the cage. Chipper uses the hardcloth to cool himself when he gets warm or tired and I've since added a tube so he has a high vantage to watch us from. I never took pictures of the cage because for most of the time I've had Chipper, I thought I'd have to give him up.

If anyone wants to see this cage I'd be willing to take a pic or two.
 
I'd like to see a picture of it, the more the better! :) I'm glad you were able to keep Chipper.
 
Me too! He's such a great little guy and he's got my husband wrapped around his little digits.

I'll work on those pictures. This is actually a good time since I'm planning a cage cleaning tonight with fleece changeovers. I made the space fit so it's got walls and furniture surrounding it and blocking camera angles. I'll try to have something to post tomorrow.

Looking forward to seeing yours when you finish it, too.
 
Here's a thread with some info and more links to other homemade cage threads. If you search homemade, handmade or melamine cage you can read through a bunch of stuff.

DevnChip--I second the pictures if it isn't too much trouble. I can't seem to picture it in my head. I always think everyone should post their homemade cage pics since it helped a ton when I made my cage.
 
Whew! Ok, we all know they poo, big time. Feel like I shoveled out a stall! Here are the gorgeous results. The first pic is the first floor, the second is the second floor, the third is another shot of the first floor with a view of the hay bag tied to the door. The forth pic is that shot with Chipper for size and the last is the clip on the second floor door. Both clips are the same. Chipper has wall surfed the doors and they've held. I grip tested them before I trusted them. I've encountered some wimpy clips that won't hold two pages together. Sorry there aren't any shots from farther away. Small room and too much stuff equals just enough space to live in.

In the third pic you can see the feed bin and the water bottle hung on the front of the cage. I had to clip out some bars to get that feed bins mouth into the cage. I just twisted a wire cutter a few times at the point where I wanted the bar to be cut and it snapped. Did the same to the pieces I extended the top of the cage with. If this metal bends at all, it weakens and breaks so the pieces I removed were trash. Chipper nibbled some of the paint off the edges of the feeder but hasn't done any damage to the bars of the cage. I hear some of you saying "yet" in your heads. ;)
 

Attachments

  • IMG_4334a.jpg
    IMG_4334a.jpg
    44.1 KB · Views: 35
  • IMG_4336a.jpg
    IMG_4336a.jpg
    43.5 KB · Views: 34
  • IMG_4337a.jpg
    IMG_4337a.jpg
    49.3 KB · Views: 36
  • IMG_4341a.jpg
    IMG_4341a.jpg
    45.8 KB · Views: 36
  • IMG_4333a.jpg
    IMG_4333a.jpg
    61.9 KB · Views: 30
And last but not least, Chipper in his tunnel thanking me for a job well done! :)

Actually he's telling me there better be a shreddy in it for him for putting up with all the fuss. This is also a great shot of the top of the cage. Those black things are velcro strips instead of wire. Chipper has tasted them, but treated them just like he treats his fleece. He pulled experimentally and decided he didn't like the flavor/texture of that and left it alone. Still, I only have them on the very top and at the spots on the bottom that are covered by the 4" lip of the floor pan.
 

Attachments

  • IMG_4343a.jpg
    IMG_4343a.jpg
    51.3 KB · Views: 32
Dev, your cage is nice! What do you have your Chin Spin mounted on? I just had to go back to the hardware store and get more hardware cloth to replace that was supporting the Chin Spin. It's not cheap, it makes me feel like I should have ponied up the $$ for the FN.
 
My chin spin is mounted on a grid panel separate from the cage. It's off-center and the bottom of the wheel is one square from the edge of the panel. I then wired the top of the panel to the mesh side of the cage and the bottom to the front of the cage with a bit of a gap. The gap allows space for the hardware that can't poke through the mesh. It also angles the running surface of the wheel a bit, which may or may not be a good thing depending on the habits of your chin. Mine doesn't pee on his wheel so it's not a problem.

Behind the wheel is a counter corner that invades the cage space a bit. I had to angle the mesh grid into the cage by one grid square to make the second level fit the space that was there for it. That's the beauty of working with components that don't have to fit a specific way to work. You can work around the space you have.

I recommend these panels that I used to make my cage for reinforcing behind a chin spin. They don't bend and are very strong and stable. My travel cage wheel wall is made up of 5 grid panels. 4 to make the wall and one to reinforce the center of the wall behind the wheel. I linked some of the squares together with rings from an old chainmail project I never finished so that it goes together quickly. The rings have to be opened and closed with pliers in each hand. Then I used some wire to finish the rest of the linking. I lined up the travel wheel (not a heavy chin spin) with the wall and the 5th panel and mounted it to the cage and used some small clips similar to the cage door clip to further stablize the extra panel. I could lean on that thing from the top and it held. Chipper barely rattled the cage when he used the wheel. That wall had the wheel and a corner shelf mounted on it and that was it. I could only use two floor panels in the travel cage because I hadn't adjusted the top floor for the wheel. Those floor panels went on the other side of the cage.

Now I'm wishing I'd taken pictures of that travel cage. Sigh. Here are pics of the chin spin that should show the panel setup I described. I don't have a pic from behind the wheel to show the bolts. I'll see if I can get a good one from the side if you need it.
 

Attachments

  • IMG_3892b.jpg
    IMG_3892b.jpg
    97.3 KB · Views: 13
  • IMG_4333b.jpg
    IMG_4333b.jpg
    89.8 KB · Views: 12
I'll definitely post pictures of my cage when I get it finished. It'll probably be awhile though.

I've heard melamine is toxic to chins. I know you can put steel quard things on the edges, but what about the wall part? Can't a chin chew it like drywall?

I talked to my mom a bit about building it, and she was hesitant. She said I'll probably start with building a rectangle and end up with a triangle. Any tips to avoid this?

Dev- your cage turned out great, thank you for sharing! (And thank you to everyone else too, it's helping a lot!) How much did yours cost to make? Where did you get the grid squares? I'm thinking about using those too. They seem sturdier than hardware cloth, especially to mount ledges and such.
 
Back
Top