This seems like the perfect place to show off what I have been working on over the last few weeks!
I started off with Blue and his super small hamster/rat cage. Ya know the wire one from petco that folds flat? Yep, that was the one. I knew Blue needed a better pad pronto. In searching for a bigger cage, I came across Jack and his double ferret nation cage.
I was bumbling along, and I've learned a lot since then, but things couldn't have worked out better. I immediately moved Blue into the bottom portion of the FN, sewed fleece liners for all the shelves, and replaced the wire ladders with wooden ones (little did I know they didn't need the ladders at all!) I added a few cardboard tunnels, a corner shelf and wheel to each level, and was feeling rather proud of myself. After all, it was quite the upgrade for Blue (His old cage is 1/2 the size of one level!) and for Jack too.
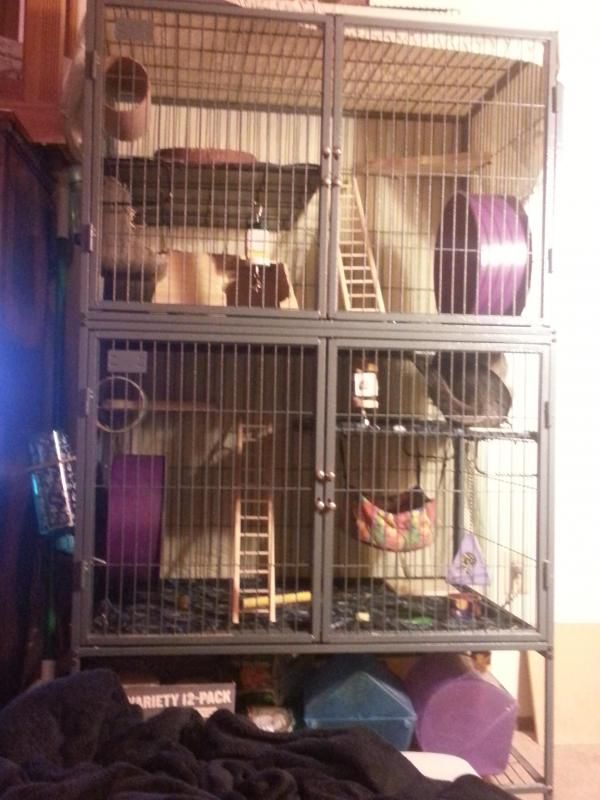
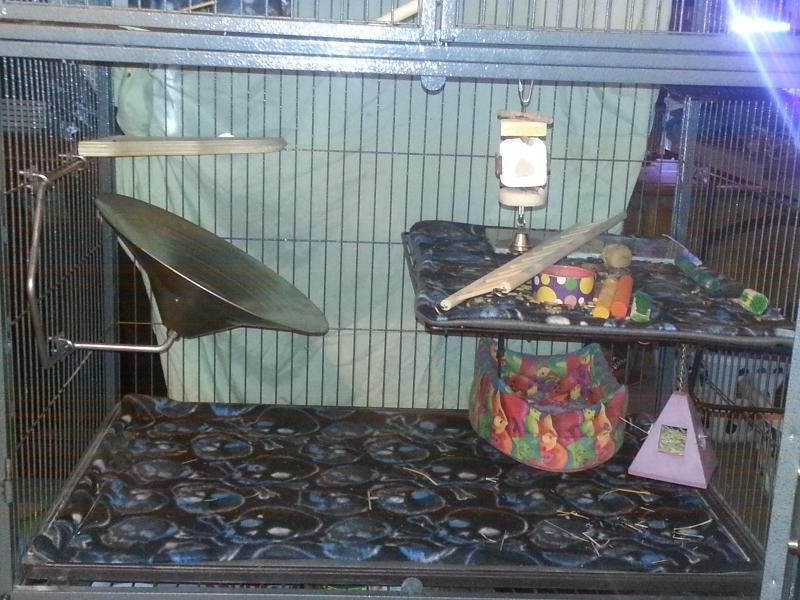
The other items you see, like the hammock on the bottom and the huts on top came with my guys from their old homes. I figured it might make them more comfortable to leave some of that stuff in there. And don't worry, those wheels were installed just long enough for Jack to decide he loved his. I noticed his back hitting the bar; did some research, and pulled them out.
Jack and Blue quickly became friends and are now sharing the cage. I went ahead and ordered a Flying Saucer. I thought they would NEVER get the hang of it! Blue picked it up after a week or so, and I was so relieved to see Jack, finally after 3 weeks or so, running!
So, I knew this was better that they started out with, but I've been really wanting to put more shelves in it, remove the cutout completely and open it up a bit. Blue particularly likes to run around the cage like its a race track obstacle course, so we needed more shelves!
Thanks to Rivendell Chinchillas and their measurements, I was able to update the whole cage for about $70, and the only tool I needed was a drill. If anyone wants these measurements, look here:
http://www.rivendellchinchillas.com/fn.html
Lowes will do 2 wood cuts for free, but after that its only .25 per cut. Even though that is posted on their website, and I had over 30 cuts of wood, they told me they didn't charge for cuts so in the end they were free!
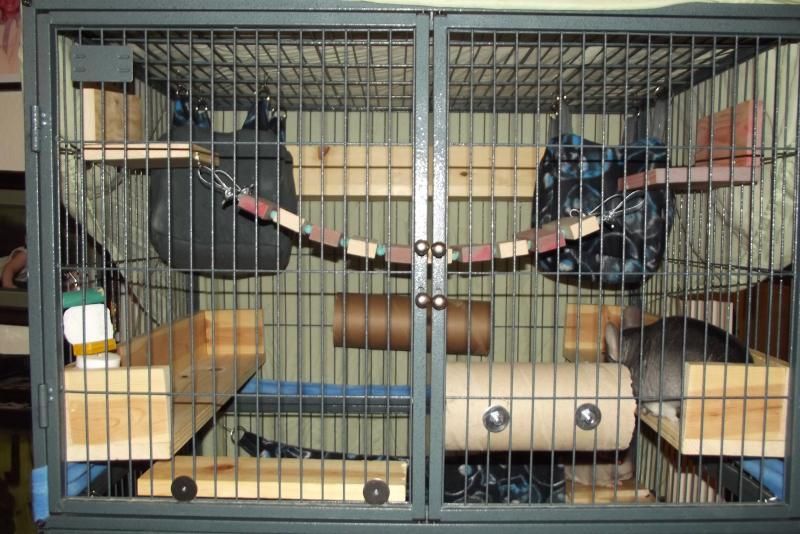
In addition to the tutorial I mentioned, I had 2 6" pieces cut from both the 4" and 6" wood to create the end pieces for the suspension bridge. a 6' 1"x2" board was cut into 6" pieces, and I drilled them at home. I used stone beads I found at Michaels, and Voilà; and awesome bridge.
The bottom of the cage now looks like this! Notice Blues old hammock in the corner? Its now the litter pan!
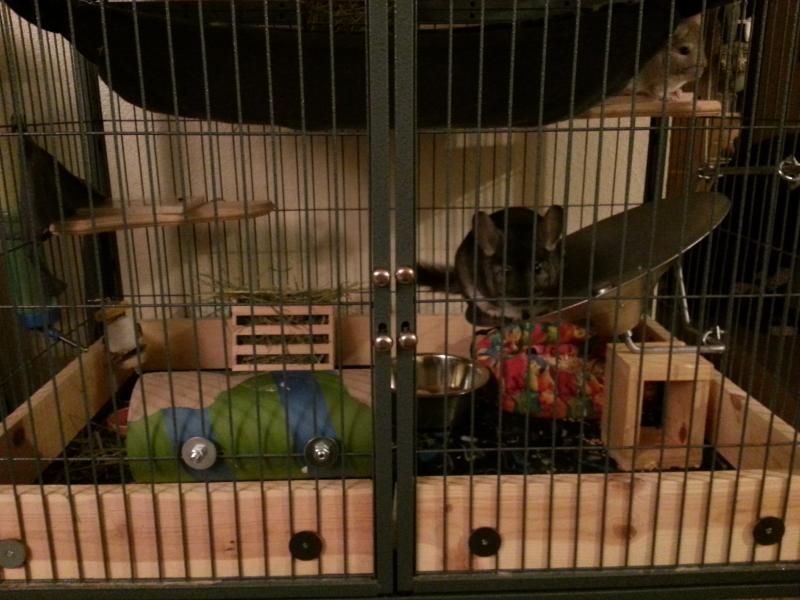
I used the fleece I had made for the shelves and turned it into a hammock. A bit of leftover wood made the extra "poop guard-less" shelves, and the little hay holder on the bottom.
Blues Reaction? To zip-zam-zoom from top to bottom. Jack?
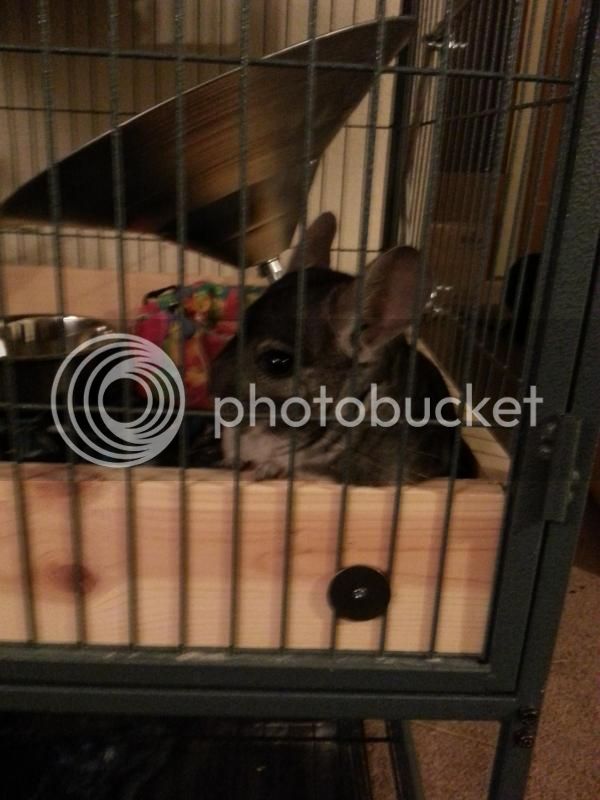
He seems less impressed!
I started off with Blue and his super small hamster/rat cage. Ya know the wire one from petco that folds flat? Yep, that was the one. I knew Blue needed a better pad pronto. In searching for a bigger cage, I came across Jack and his double ferret nation cage.
I was bumbling along, and I've learned a lot since then, but things couldn't have worked out better. I immediately moved Blue into the bottom portion of the FN, sewed fleece liners for all the shelves, and replaced the wire ladders with wooden ones (little did I know they didn't need the ladders at all!) I added a few cardboard tunnels, a corner shelf and wheel to each level, and was feeling rather proud of myself. After all, it was quite the upgrade for Blue (His old cage is 1/2 the size of one level!) and for Jack too.

The other items you see, like the hammock on the bottom and the huts on top came with my guys from their old homes. I figured it might make them more comfortable to leave some of that stuff in there. And don't worry, those wheels were installed just long enough for Jack to decide he loved his. I noticed his back hitting the bar; did some research, and pulled them out.
Jack and Blue quickly became friends and are now sharing the cage. I went ahead and ordered a Flying Saucer. I thought they would NEVER get the hang of it! Blue picked it up after a week or so, and I was so relieved to see Jack, finally after 3 weeks or so, running!

So, I knew this was better that they started out with, but I've been really wanting to put more shelves in it, remove the cutout completely and open it up a bit. Blue particularly likes to run around the cage like its a race track obstacle course, so we needed more shelves!
Thanks to Rivendell Chinchillas and their measurements, I was able to update the whole cage for about $70, and the only tool I needed was a drill. If anyone wants these measurements, look here:
http://www.rivendellchinchillas.com/fn.html

Lowes will do 2 wood cuts for free, but after that its only .25 per cut. Even though that is posted on their website, and I had over 30 cuts of wood, they told me they didn't charge for cuts so in the end they were free!
In addition to the tutorial I mentioned, I had 2 6" pieces cut from both the 4" and 6" wood to create the end pieces for the suspension bridge. a 6' 1"x2" board was cut into 6" pieces, and I drilled them at home. I used stone beads I found at Michaels, and Voilà; and awesome bridge.
The bottom of the cage now looks like this! Notice Blues old hammock in the corner? Its now the litter pan!

I used the fleece I had made for the shelves and turned it into a hammock. A bit of leftover wood made the extra "poop guard-less" shelves, and the little hay holder on the bottom.
Blues Reaction? To zip-zam-zoom from top to bottom. Jack?

He seems less impressed!


